DKS ServiceWorks
A chisel looks simple, but its risks are easy to underestimate. A blunt edge, mushroomed head, or poorly supported workpiece can turn a controlled cut into flying metal or timber. So, what are common mistakes when using chisels? The answer usually involves poor inspection, incorrect striking technique, weak hand positioning, and unsuitable eye protection. These errors appear in workshops, construction sites, and maintenance rooms.
Industry guidance supports this concern. OSHA’s Hand and Power Tools guidance recommends inspecting tools before use, keeping cutting edges sharp, and removing damaged equipment from service. The U.S. Consumer Product Safety Commission’s National Electronic Injury Surveillance System also records emergency-department injuries involving hand tools, although its public categories rarely isolate chisels. That limitation matters. Chisel injuries can disappear inside broader tool-related statistics. NIOSH research on hand-tool safety further connects forceful exertion, awkward wrist positions, and repeated impact with hand and upper-limb strain. HSE guidance on hand-arm vibration adds another warning for powered chiselling, especially during prolonged work.
Small details matter. A cold chisel with a flared striking end should not meet a hammer. A wood chisel should not be driven toward a hidden hand. The workpiece must stay stable. Your grip must leave room for error. I have seen experienced users rush these checks, assuming skill will compensate. It will not. This guide examines practical mistakes, evidence-based controls, and safer habits without pretending that every workshop has perfect conditions. Sometimes, the overlooked step is the most important one.
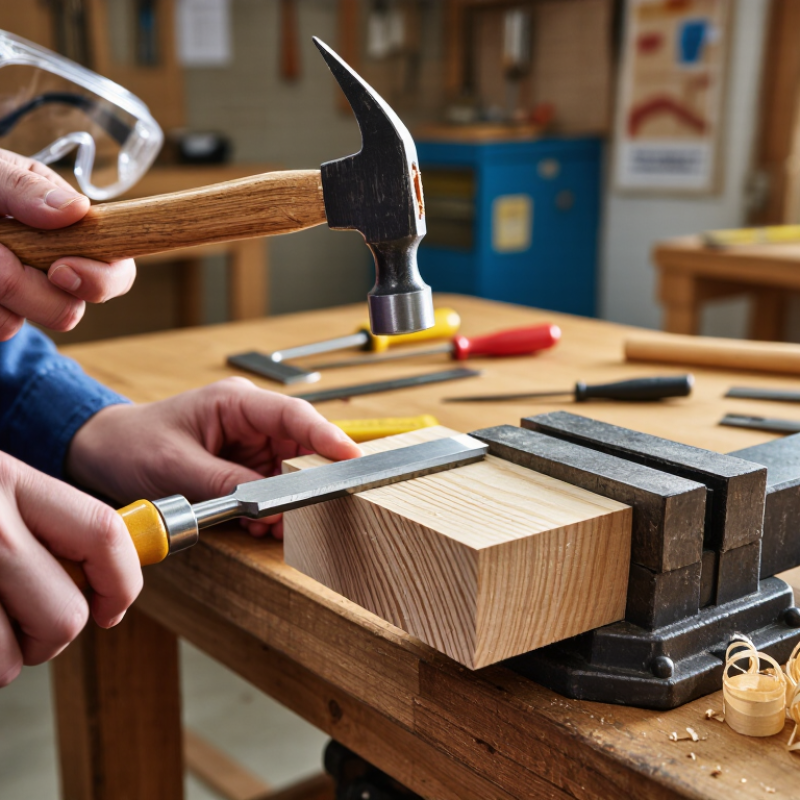
A chisel is not a universal tool. Its edge shape, width, and steel hardness should match the material and cut. Use a bevel-edge chisel for controlled woodworking joints. Choose a firmer chisel for rough trimming and heavier impact. For masonry, use a purpose-built cold chisel, not a woodworking model.
I have seen damaged edges caused by choosing a narrow blade for broad cuts. The user then hits harder, loses control, and raises the risk of flying fragments. The UK Health and Safety Executive reported 561,000 self-reported non-fatal workplace injuries in Great Britain during 2022/23. Chisels are only one hazard, but tool selection remains a practical prevention step. Inspect the cutting edge, handle, and striking end before use. A mushroomed striking head needs attention, not another blow.
When excessive force feels necessary, stop and reassess the tool, edge, and workpiece.
How to Avoid Common Mistakes When Using Chisels?
Inspecting and Preparing the Chisel Before Use
Before a chisel touches wood, inspect it under bright light. I check the cutting edge, bevel, handle, and metal shaft for damage. The edge should look straight and even, without chips, cracks, or rolled sections. A tiny defect can make the tool jump unexpectedly. Never ignore looseness. The handle must fit firmly around the shaft. I once skipped this check and struggled with poor control during a simple joint. That mistake was avoidable. I also wipe away oil, dust, and moisture before gripping the tool.
Tips: Keep the blade covered during storage. Place the chisel on a stable bench before inspecting it. Test sharpness carefully, using light pressure and a safe direction. Do not drag a finger across the edge. A dull chisel may need careful honing before use, but excessive sharpening can change its intended bevel. I still sometimes remove too much metal when rushing. Patience matters here.
Prepare the work area as carefully as the tool. Secure the workpiece so it cannot shift under hand pressure. Check that the cutting path is clear of nails, knots, and hidden metal. Hold the chisel with both hands when positioning it. Use controlled taps only after the edge is aligned. Eye protection is sensible, especially when cutting hard material. A clean setup improves accuracy and reduces the temptation to force the blade.
| Inspection Dimension | What to Check | Safe Preparation | Common Mistake to Avoid | Ready When |
|---|---|---|---|---|
| Blade and cutting edge | Look for chips, cracks, deep rust, rolled edges, or uneven grinding. | Remove light rust and restore the edge with an appropriate sharpening method. Do not use a damaged blade. | Starting work with a blunt or chipped edge, which can require excessive force and may slip. | Edge is continuous and defect-free |
| Bevel and sharpening | Confirm that the bevel is even and that the back is sufficiently flat near the edge. | Use the intended bevel angle for the tool. A common bench-chisel bevel is approximately 25–30°, but the tool specification takes priority. | Changing the angle excessively or creating a rounded, inconsistent edge. | Edge cuts cleanly with light pressure |
| Handle condition | Inspect for splits, looseness, sharp splinters, or damage around the striking end. | Replace or repair a defective handle before use. Keep the grip dry and free from oil. | Using a loose or split handle that can break or reduce control. | Handle is secure and comfortable |
| Tang, socket, or blade connection | Check for movement between the blade and handle, visible gaps, bent metal, or corrosion at the joint. | Remove the chisel from service if the connection is loose or structurally damaged. | Trying to tighten or improvise a repair while the tool is in active use. | No looseness or visible damage |
| Striking end | For a striking chisel, check that the striking end is not mushroomed, cracked, or badly deformed. | Dress or replace a dangerously mushroomed end according to applicable workshop procedures. | Striking a non-striking chisel handle or using a hammer on a tool not designed for impact. | Tool is rated for the intended impact |
| Cleanliness and corrosion | Check for oil, adhesive, dirt, metal filings, and corrosion on the blade or handle. | Clean and dry the tool. Apply a light protective film to bare steel after use, keeping the cutting edge suitable for work. | Holding an oily handle or allowing debris to interfere with accurate cutting. | Surfaces are clean, dry, and grippy |
| Workpiece stability | Ensure the material is supported and cannot move or rotate during the cut. | Secure the workpiece with an appropriate vise, clamp, or stable support before positioning the chisel. | Holding the workpiece by hand near the cutting path. | Workpiece does not shift under force |
| Personal protective equipment | Consider eye protection and the risk of flying chips, especially when striking or cutting brittle material. | Wear suitable eye protection and task-appropriate footwear. Use hearing protection when noise levels require it. | Assuming a small hand tool cannot produce hazardous fragments. | PPE matches the task and material |
| Cutting direction and hand position | Identify the intended cutting path and keep hands outside the blade’s travel area. | Plan the first shallow cut and maintain a stable, balanced stance before applying force. | Pushing toward the body or placing a hand in front of the cutting edge. | Hands and body are clear of the path |
| Final functional check | Test the tool on a small, controlled area using moderate force. | Stop immediately if the chisel slips, vibrates unusually, binds, or produces unexpected damage. | Increasing force to compensate for poor sharpening, unstable material, or a damaged tool. | Controlled cut with predictable response |
How to Avoid Common Mistakes When Using Chisels?
Using a proper grip starts with control, not force. Hold the chisel firmly, but keep your wrist relaxed. Place your thumb behind the shaft, away from the striking path. Keep your other hand behind the cutting edge. A small slip can turn a careful cut into a painful injury.
The cutting angle should match the material and task. For paring, I keep the bevel nearly flat and use slow, controlled pressure. For chopping, a steeper angle helps the edge enter cleanly. The chisel should feel stable, not forced. I once used too shallow an angle on hard timber. The edge skated across the surface. That mistake reminded me to inspect grain direction before cutting.
Strike the handle squarely with a suitable mallet. Avoid sideways blows and random hammering. Light taps usually reveal whether the edge is tracking correctly. Stop when the handle, edge, or workpiece feels unstable. The U.S. Bureau of Labor Statistics reported that contact with objects and equipment caused 22.8% of nonfatal workplace injuries involving days away from work in 2023. This supports treating impact control as a serious hazard. OSHA also requires appropriate eye protection where flying particles may occur. Wear it. Tiny chips travel farther than expected. My technique still needs checking when fatigue affects my grip.
Using a proper grip, a controlled cutting angle, and the right striking technique helps improve accuracy and reduce damage to the workpiece. The chart shows commonly recommended bevel angles for different chisel tasks.
Practical guidance: Use a lower bevel angle for light paring and a higher angle for chopping or mortising. Keep both hands behind the cutting edge, guide the chisel with a controlled grip, hold it at a consistent angle, and strike with moderate, deliberate force rather than uncontrolled blows.
A chisel can damage more than a workpiece. It can split timber, bend under force, or cut skin in a moment. Before cutting, inspect the blade and handle under bright light. Look for cracks, loose fittings, or a mushroomed striking end. Do not use a damaged chisel. I once ignored a small handle split, and the next tap sent a sharp fragment across the bench. That mistake was avoidable.
Secure the workpiece with a clamp or vise. Never hold a small piece near the cutting path. Keep both hands behind the edge, and push the chisel away from your body. Use a wooden mallet when striking. A metal hammer can deform the handle and make control less predictable. Cut with the grain when possible. Listen for changes in resistance. If the tool slips, stop and reset your position. A sharp chisel needs less force, but sharpening it unevenly can make it wander. I still check my bevel angle twice because rushing creates errors.
Tips:
Wear eye protection, clear loose clothing, and keep the bench free of scraps. Place the chisel with its edge facing away from you. Test the cut on scrap wood first. Use light taps before applying more force. If your hands feel tired, take a short break. Fatigue quietly reduces control. Clean and dry the tool after use, then store it where the cutting edge cannot contact other tools.
Cleaning, sharpening, and storing chisels safely prevents avoidable damage and injuries. Wipe the blade after every session, especially after working with damp wood. Use a clean cloth to remove dust, resin, and fingerprints. A light protective oil can help prevent rust. Keep oil away from unfinished handles and work surfaces. I once stored a slightly wet chisel, and a small rust spot appeared overnight.
Sharpen chisels on a stable, non-slip surface. Check the bevel before removing metal. Use steady strokes and consistent pressure. A honing guide can help maintain the correct angle. Stop when a fine burr reaches the back edge. Remove that burr carefully with a few light passes. Wear eye protection during powered sharpening. Heat can damage the blade, so cool it often. My early sharpening attempts were uneven. I now check the edge under bright light.
Tips: Store chisels in a dry drawer, rack, or protective roll. Never leave sharp edges loose in a toolbox. Keep each blade separated from metal tools. Place the cutting edge downward only when the holder protects it. Inspect handles for cracks before use. Replace damaged guards promptly. A clean, sharp chisel needs less force, but it still demands controlled hand pressure.
Check the cutting edge, bevel, handle, and metal shaft under bright light. Look for chips, cracks, bends, or rolled sections. Small defects matter.
Make sure the handle fits tightly around the shaft. Do not use a loose handle. Place the chisel on a stable bench during inspection.
Test sharpness carefully with light pressure and a safe direction. Never drag a finger across the edge. Hone a dull edge gently, because excessive sharpening changes the bevel.
Secure it firmly so hand pressure cannot move it. Check the cutting path for nails, knots, or hidden metal. A shifting board can ruin control.
Keep your wrist relaxed and hold the chisel firmly. Place your thumb behind the shaft. Keep the other hand behind the cutting edge. Never rush.
For paring, keep the bevel nearly flat and apply slow pressure. For chopping, use a steeper angle. Follow the grain direction, especially in hard timber.
Strike the handle squarely with a suitable mallet. Use light taps and watch the edge. Avoid sideways blows and random hammering. Stop if anything feels unstable.
Hard material can send tiny chips across the work area. Eye protection helps reduce this risk. Wear it whenever particles may fly.
Fatigue can weaken your grip and judgment. I sometimes notice mistakes only after rushing. Take a pause when control starts slipping. Five quiet seconds help.
Using chisels safely and effectively begins with selecting the right type and size for the task. Before use, inspect the blade, handle, and striking end for cracks, looseness, or excessive wear, then make sure the workpiece is stable and the cutting edge is sharp. Hold the chisel firmly with a controlled grip, position it at an appropriate angle, and use measured strikes rather than excessive force. These habits improve accuracy and reduce the risk of slipping or damaging the material.
Many users ask, “what are common mistakes when using chisels?” Common errors include using the wrong chisel, striking a damaged tool, applying an unstable grip, and neglecting hand protection. Avoid directing the blade toward your body or using a chisel as a pry bar. After each project, remove debris, sharpen the edge correctly, and check for damage. Store chisels in a dry, organized place with their cutting edges protected, helping preserve the tools and keeping future work safer.
